Some of my tried and tested recipes for Preserving, Pickling and Fermenting

Kimchi
Home made kimchi was one of the first things I ever fermented - I didn't have any of the gochujang paste at the time, so I substituted paprika and a little cayenne. It turned out so well that we now almost always have a jar in the fridge ready to go. I use kimchi anywhere you'd use a pickle, and chilli or mustard, and it also makes a great addition to egg fried rice.
Oh, and I bought some gochujang paste - it keeps very well in the cupboard, but I do put some cling-film over and in contact with the paste to stop it oxidising and drying out.
Ingredients
- 500g - 750g chinese leaf (Napa cabbage)
- 1/4 cup table salt
- 3 large cloves garlic
- 2cm fresh ginger
- 1 tsp sugar
- 2 tbsp fish sauce (for vegan substitute 1 tbsp miso + 1 tbsp low salt soy)
- 3 tbsp water
- 3 tbsp gochujang paste
- 4 spring onions, cut into 2cm pieces or thinly sliced.
- 1 medium carrot, cut into thin slices - optional
- 1/2 Japanese Radish (Daikon) - optional.
Instructions
- Cut the cabbage in half lengthwise, remove the core, then slice again lengthwise (into quarters)
- Cut the cabbage into 1-2cm strips.
- Place the cabbage in a bowl and cover with the salt. Massage until the cabbage goes soft (about 2-3 mins)
- Cover the cabbage with water and weigh down under a plate & weight for 1.5 hours.
- Place the garlic, ginger, sugar, fish sauce / miso+soy, water, and gochujang paste in a blender and blitz until paste.
- Drain the cabbage and rinse 3 times using a salad spinner gently.
- Add the paste, carrots and spring onions to the cabbage and the paste and mix well.
- Pack into a fermentation jar, and press down under weights. There might not be quite enough liquid to cover the cabbage at first, but more should be released from the vegetables over the first 24 hours. If you’re making the Kimchi directly in the Kilner jar then it’s important to release the pressure 2-3 times a day during the main ferment.
- Seal and air-lock the jar and place in a warm, dark place for 3 days to ferment.
- Decant into a Kilner jar and refrigerate once the fermentation is complete.
- Kimchi will keep for months in the fridge, and it seems to be good to eat as long as it's not mouldy.
Troubleshooting Kimchi
- Too sour: too long fermenting.
- Too spicy: adjust chilli.
- Too bitter: too much garlic.

Pickled Chillies
These pickled chillies are very quick and easy to make, and they keep in the fridge for a long time. The chillies can be cut to whatever size you like - sliced into rings is good, or length-ways into strips is also great for less spicy varieties. The only trick is not to make the pieces too small, or they can be fiddly to get out of the jar!
The pickling does seem to take some heat out of the chillies, so don't be scared to try hotter varieties. We particularly like Jalapeño and Hungarian Hot Wax as well as Serrano.
Ingredients
- 6-10 (120g) medium/large chillies (Jalapeño or Hungarian Hot Wax)
- 1 cup white vinegar
- 1 cup water
- 1 clove garlic sliced
- 1 bay leaf
- 1 tablespoon salt
- 1/4 teaspoon mustard seed
- 1 teaspoon peppercorns
- 1 spring onion sliced (optional)
- 1/2 small carrot, thinly sliced (optional)
Instructions
- Wash and slice the chillis, removing the stems. Discarding any that are discoloured.
- Next, add all the ingredients except the chillis slices to a pot. Bring the mixture to a quick boil.
- Add the chillis slices, and bring back to the boil
- Give it a quick stir, then remove from heat. Cool slightly, then remove the bay leaf.
- Pour the pickled chillis, brine and all into one 500ml or 2 * 250ml jar.
- Invert and allow to cool.
- Allow to mature for 2-3 weeks before opening. Refrigerate after opening.

Fermented Garlic Paste
We always have a jar of fermented garlic paste in the fridge, to the point that we start to get concerned when it begins to run out. It keeps for a very long time (up to a year), but it never lasts that long around us.
The amounts below are for 500g of garlic, but the key is to use 2.5% salt by weight of garlic. The method below for peeling the garlic is the best I've managed to find, although the chilling/soaking does take a little time.
Ingredients
- 500g garlic
- 12.5g sea salt
Instructions
- Break apart each bulb of garlic into cloves. Cut the foot off each clove and place in a bowl of cold water.
- Put the bowl of water & garlic into the fridge and leave to chill for 1-2 hours.
- Once soaked, the garlic cloves should peel easily.
- Add the garlic and salt to a blender and process until the desired consistency (I like a bit of texture - not a completely smooth paste)
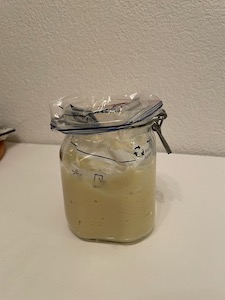
- Ferment the garlic in a Kilner jar, using a water-filled zip-lock bag as the weight+follower
- Ferment for 10-15 days in a cool dark place. Do not be concerned if the paste turns a bright blue/green at the start of the ferment. This is perfectly safe and the paste will return to its normal colour by the end of the ferment. This is a fairly gentle ferment, but I would still recommend a bowl underneath the Kilner jar to catch any liquid that escapes.
- Once the fermentation is complete, remove the zip-lock bag and transfer into jars for storage.
- Keep in the fridge for up to 12 months